
From Tough Pods to Tender Bright Green Beans in Minutes
Fava beans have a reputation for being fussy. They arrive in thick, fuzzy pods, and then each bean hides inside a second, tougher skin that needs to come off before cooking. It sounds like double the work, and that’s exactly why so many home cooks avoid them altogether. But here’s the good news: once you know the blanch-and-slip method, peeling fava beans becomes genuinely easy, almost meditative, and surprisingly quick.
I avoided fava beans for years for exactly this reason. I’d see them at the farmer’s market, admire their beautiful pods, and then walk right past them toward the snap peas. Then a friend served me a simple bowl of warm fava beans with olive oil, lemon, and mint, and I realized I’d been missing out on one of spring’s greatest pleasures. I went home determined to learn the technique properly, and it took me all of one batch to realize how straightforward it really is.
This guide walks you through the entire process from start to finish: how to choose the best fava beans, how to remove them from the pod, the blanch-and-shock trick that makes the outer skin slip right off, and how to store them so nothing goes to waste. Whether you’re making a fava bean salad, a spring risotto, or a simple bowl of beans with good olive oil, this method will get you there with minimal frustration. For more seasonal vegetable inspiration, explore our collection of salad recipes.
Why This Method Works: Blanching the shelled beans in boiling water for just 60 seconds loosens the tough outer skin from the tender bean inside. Plunging them into ice water stops the cooking instantly and preserves their vibrant green color. The skins then slip off with almost no effort between your fingers.
What Are Fava Beans?
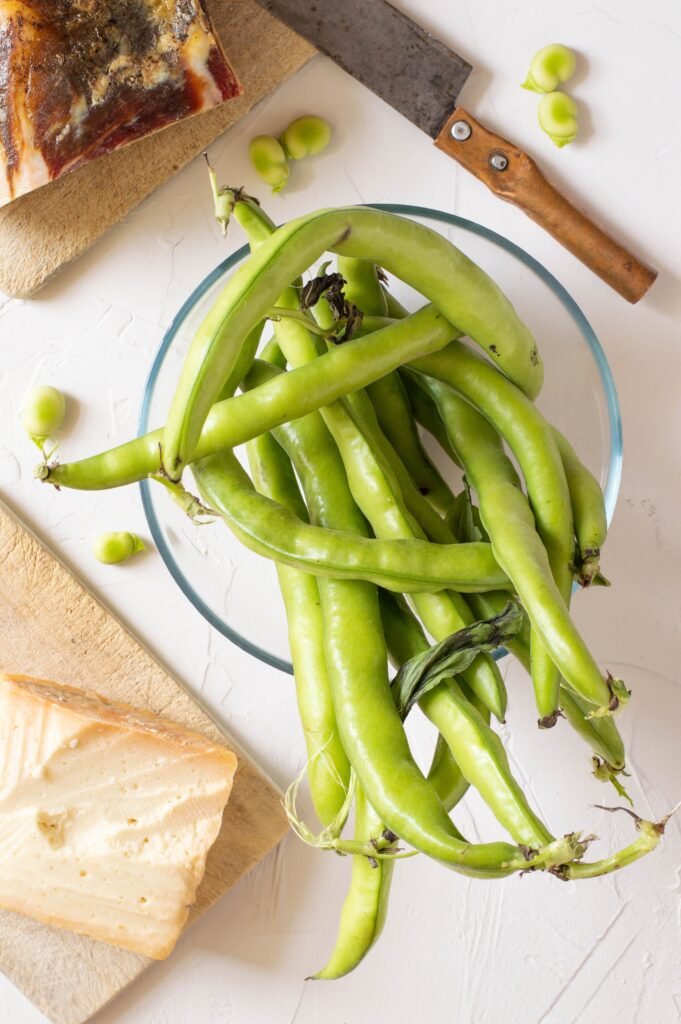
Fava beans, also known as broad beans, are one of the oldest cultivated crops in the world, with roots stretching back thousands of years across the Mediterranean and Middle East. They grow in long, thick, slightly fuzzy green pods, each containing several large, flat beans nestled in a spongy white lining. Fresh fava beans have a buttery, slightly sweet, faintly grassy flavor that’s often compared to a cross between lima beans and edamame.
There are two stages at which you can eat them. Young, small fava beans can be eaten whole, pod and all, when they’re very tender. Larger, more mature beans need to be shelled from the pod and then peeled again to remove the bitter, tough outer skin. This second peeling step is what intimidates most people, and it’s exactly what this guide solves.
Why Fresh Fava Beans Are Worth the Effort
Fresh fava beans have a flavor that frozen or canned versions simply can’t match. They’re sweet, tender, and almost creamy, with a bright green color that’s beautiful on the plate. They’re also packed with protein, fiber, folate, and iron, making them a genuinely nutritious addition to spring and early summer meals. Once you’ve tasted them freshly peeled and lightly cooked, the frozen version will never quite satisfy you again. For more spring and summer vegetable recipes, browse our collection of dinner recipes.
Flavor & Texture Profile
- Flavor: Sweet, buttery, and subtly grassy with a nutty finish. Fresh favas are far milder than their reputation suggests – they’re nothing like bitter greens.
- Texture: Tender, creamy, and slightly firm when properly peeled and lightly cooked. The outer skin is tough and papery, which is why it must be removed.
- Aroma: Fresh, green, and faintly sweet – like a cross between fresh peas and a garden in spring.
Why You’ll Love This Method
Foolproof Technique
The blanch-and-shock method works every single time.
Keeps Beans Green
The ice bath locks in that beautiful bright green color.
Actually Fast
Once you get a rhythm going, a whole batch takes minutes.
No Special Equipment
Just a pot, a bowl of ice water, and your hands.
- Foolproof Technique: The blanch-and-shock method works every single time, no matter how tough the skins are.
- Keeps Beans Green: The ice bath stops the cooking instantly and locks in that beautiful bright green color.
- Actually Fast: Once you get a rhythm going, a whole batch takes just a few minutes.
- No Special Equipment: Just a pot, a bowl of ice water, and your hands – nothing fancy required.
- Better Flavor: Removing the tough skin reveals the sweet, buttery, creamy bean inside.
- Freezer-Friendly: Peeled favas freeze beautifully, so you can enjoy them year-round.
- Nutritional Powerhouse: High in protein, fiber, folate, and iron.
Ingredients
For Peeling Fava Beans
- Fresh fava beans in pods – 2 lbs (yields about 1½ to 2 cups of peeled beans)
- Water – enough to fill a large pot for blanching
- Ice – 4 cups (for the ice bath)
- Salt – 1 tablespoon (optional, for the blanching water)
Premium Ingredient Options
- Fava Beans: Look for small to medium pods that feel firm and heavy – smaller beans are sweeter and more tender.
- Salt: Use flaky sea salt in the blanching water to subtly season the beans.
- Finishing: Good olive oil, lemon zest, and fresh mint make peeled favas shine.
Budget Alternatives
- Buy frozen double-peeled fava beans if fresh aren’t in season – they’re a great shortcut.
- If fresh favas are expensive, use half favas and half edamame for a similar texture and color.
- Skip the optional salt in the blanching water – it’s not essential.
Common Ingredient Mistakes
- Using old or oversized pods: Large, mature beans have tougher skins and a starchier flavor. Smaller pods are always better.
- Skipping the ice bath: Without it, the beans keep cooking and turn mushy and dull green.
- Overcrowding the pot: Too many beans at once lowers the water temperature and leads to uneven blanching.
Substitutions & Variations
- No Fava Beans: The same blanch-and-slip technique works beautifully for edamame, lima beans, and even chickpeas.
- Frozen Fava Beans: If using frozen, blanch for 60 seconds and shock in ice water the same way – the skins will still slip off.
- Young Tender Favas: If the beans are very small and tender, you can skip the peeling step entirely and cook them whole.
- Edamame Style: Toss peeled favas with sea salt and chili flakes for a quick snack.
- Herb Butter Version: Warm peeled favas in butter with garlic, lemon, and fresh mint.
Equipment
Essential Tools
- Large pot (for boiling water)
- Large bowl (for the ice bath)
- Colander or slotted spoon
- Clean kitchen towels
- Cutting board (optional)
Optional Tools
- Salad spinner (for drying the beans after the ice bath)
- Small paring knife (for any stubborn skins)
- Freezer-safe bags (for storage)
Step-by-Step Instructions
- Choose and Prep Your Fava Beans
Pick pods that are firm, bright green, and feel heavy for their size. Avoid pods that are bulging excessively – those beans are older and starchier. Rinse the pods under cool water and pat them dry.
Visual cue: The pods should be smooth and glossy with no brown spots or soft areas.
Pro tip: Smaller pods are always sweeter and more tender than large ones. - Shell the Beans from the Pods
Hold a pod with both hands and snap off the stem end. Run your thumb along the seam to open the pod. Pop the beans out into a bowl and discard the empty pods. This is the first layer of “peeling” and takes just a few minutes.
Visual cue: Each pod should release three to five plump beans nestled in a spongy white lining.
Pro tip: A podcast or a good playlist makes this step fly by. - Bring a Pot of Water to a Boil
Fill a large pot with water, add the optional tablespoon of salt, and bring it to a rolling boil over high heat.
Visual cue: The water should be bubbling vigorously across the entire surface.
Pro tip: Use plenty of water – the beans should have room to move freely. - Prepare the Ice Bath
While the water heats, fill a large bowl with cold water and add 4 cups of ice. Set it next to the stove so it’s ready the moment the beans come out of the pot.
Pro tip: The ice bath is non-negotiable – it stops the cooking and locks in the bright green color. - Blanch the Shelled Beans
Add the shelled fava beans to the boiling water and blanch for exactly 60 seconds. Do not overcook them – you’re loosening the skins, not cooking the beans through.
Visual cue: The beans will brighten in color and float to the surface.
Pro tip: If your beans are very large, you can blanch for up to 90 seconds, but never more. - Shock Them in the Ice Bath
Immediately drain the beans in a colander and transfer them straight into the ice bath. Let them sit for 2 to 3 minutes until completely cool.
Visual cue: The beans should be bright green and cool to the touch.
Why this matters: The sudden temperature drop halts cooking and preserves both color and texture. - Pop the Skins Off
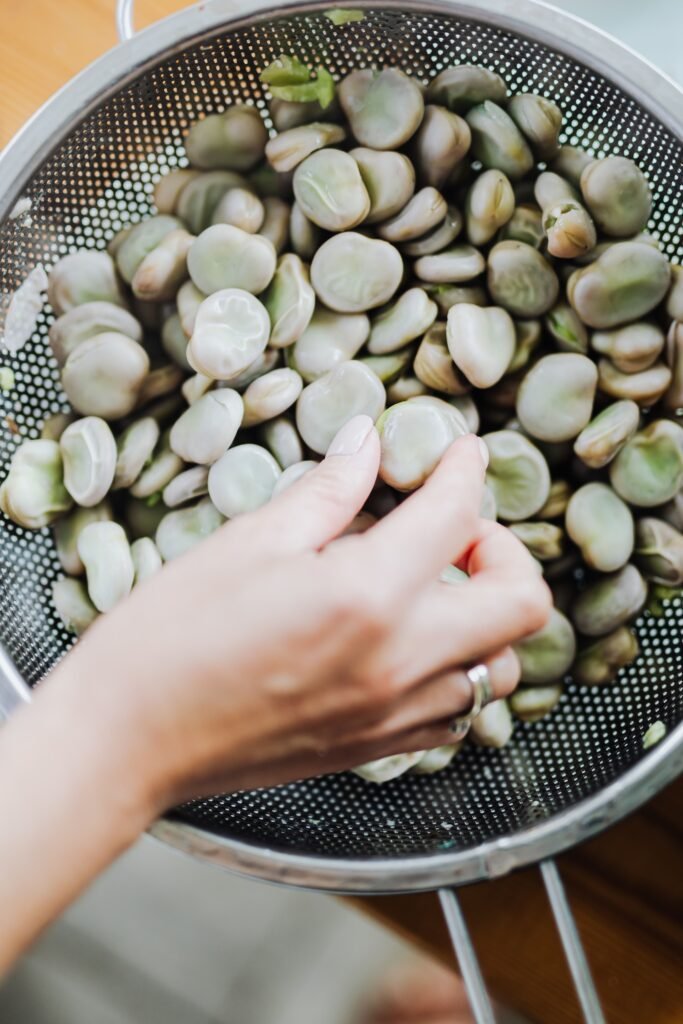
Drain the cooled beans and pat them dry with a clean kitchen towel. Take each bean between your thumb and forefinger and gently squeeze. The tough outer skin should slip right off, revealing the tender bright green bean inside. Discard the skins.
Visual cue: The skin should slide off easily with almost no pressure.
Pro tip: Use your thumbnail to nick the end of any stubborn skins, then squeeze again. - Use or Store the Peeled Beans
Your peeled fava beans are now ready to use in any recipe. If you’re not using them immediately, refrigerate or freeze them.
Pro tip: To freeze, spread the peeled beans on a baking sheet, freeze until solid, then transfer to a freezer bag.
Chef’s Secret: The one-minute blanching rule is the whole secret. Blanch any longer and the beans start to cook through, which means they lose their bright color, their firm texture, and their sweet flavor. Sixty seconds is all you need to loosen the skin while keeping the bean inside perfectly raw and tender.
Expert Chef Tips
For Perfectly Peeled Fava Beans
- Start with Small Pods: Smaller fava beans are sweeter, more tender, and easier to peel than large ones.
- Blanch Briefly, Shock Immediately: Sixty seconds in boiling water, then straight into ice water. This is the entire technique.
- Pat Dry Before Peeling: Dry beans are much easier to grip than wet ones, so pat them dry before you start squeezing.
- Set Up a Rhythm: Once you find a groove, peeling a whole batch takes just a few minutes. Pinch, squeeze, drop the skin, move on.
- Don’t Skip the Peeling: The outer skin is genuinely tough and slightly bitter – removing it completely changes the eating experience.
- Peel the Whole Batch at Once: Peel everything in one sitting, then use what you need and freeze the rest.
Flavor Balancing
- Salt: Season the blanching water lightly for subtle seasoning from the start.
- Acid: Lemon juice or zest brightens the flavor of the peeled beans beautifully.
- Fat: Good olive oil or butter adds richness that complements the beans’ natural sweetness.
- Herbs: Fresh mint, dill, parsley, and tarragon all pair beautifully with fava beans.
- Saltiness: A sprinkle of flaky sea salt right before serving brings out all the flavors.
Texture Improvement Tips
- Don’t Overblanch: Keep the beans firm and snappy – the outer skin should loosen, not the bean itself.
- Cool Completely: Let the beans sit in the ice bath until they’re fully cold, not just cool on the outside.
- Dry Thoroughly: Wet skins tear and slip awkwardly – patting dry makes peeling much easier.
- Remove Every Bit of Skin: The thin inner membrane is also tough, so make sure it comes off with the outer skin.
Cooking Science: The outer skin of a fava bean is made of tough cellulose fibers that are firmly attached to the tender bean inside. Hot water causes the skin to expand and soften while the bean inside stays relatively firm. When you then plunge the beans into ice water, the skin contracts at a different rate than the bean, which breaks the bond between them and allows the skin to slip off effortlessly.
Troubleshooting
- Skins won’t slip off – You may not have blanched them long enough, or the beans are very mature. Blanch for an extra 15 to 30 seconds and try again.
- Beans are mushy – You blanched them too long or didn’t shock them quickly enough. Sixty seconds and an immediate ice bath are essential.
- Beans turned dull or grey – They weren’t cooled fast enough. Have the ice bath ready before you start blanching.
- Beans taste bitter – You didn’t remove all the skin, or the beans were very large and mature. Remove every bit of the outer skin and the thin inner membrane.
- Beans are tough – The pods were too old. Choose smaller, firmer pods at the market next time.
- Peeling takes forever – You may be peeling beans one at a time with too much care. A firm pinch and squeeze should do most of the work.
- Beans fall apart when peeled – They were overcooked in the blanching water. Reduce the blanching time next time.
Recipe Variations
Classic Peeled Favas
Follow the guide as written for perfectly peeled beans every time.
Favas with Olive Oil & Lemon
Toss warm peeled favas with olive oil, lemon juice, flaky salt, and fresh mint.
Fava Bean Salad
Combine peeled favas with cherry tomatoes, red onion, feta, and a lemon vinaigrette.
Fava Bean Puree
Blend peeled favas with garlic, olive oil, and lemon for a vibrant dip or spread.
More Delicious Variations
- Fava Bean Risotto: Stir peeled favas into risotto during the last few minutes of cooking.
- Fava Bean Bruschetta: Mash peeled favas with ricotta and pile onto toasted sourdough.
- Fava Bean Pasta: Toss peeled favas with pasta, garlic, chili, and lemon for a quick spring dinner.
- Fava Bean Soup: Simmer peeled favas with broth, onion, and herbs, then blend until smooth.
Serving Suggestions
Classic Pairings
Peeled fava beans are wonderful in salads, risottos, pastas, and dips. They pair beautifully with fresh mint, dill, lemon, garlic, feta, pecorino, and good olive oil. For more vegetable-forward meal ideas, explore our collection of salad recipes and dinner recipes.
Garnishes
Fresh mint, lemon zest, flaky sea salt, crumbled feta, or a drizzle of good olive oil.
Drinks
A crisp white wine like Sauvignon Blanc or a light Vermentino pairs beautifully with fresh fava beans.
Presentation Ideas
Serve peeled favas in a shallow bowl with a swirl of olive oil and a scatter of fresh mint. For a party, arrange them on crostini with ricotta and a sprinkle of lemon zest.
Storage & Reheating
Refrigeration
Store peeled fava beans in an airtight container in the refrigerator for up to 3 days. Keep them slightly damp with a paper towel to prevent drying out.
Freezing
Freeze peeled fava beans on a baking sheet in a single layer until solid, then transfer to a freezer bag. They keep for up to 6 months and can be used directly from frozen.
Reheating Methods
- Stovetop (Best): Warm gently in a pan with olive oil or butter for 2 to 3 minutes.
- Boiling Water: Drop frozen or chilled favas into boiling water for 30 seconds, then drain.
- Microwave: Heat in 30-second intervals until warm.
FAQ
Do you really need to peel fava beans twice?
Yes, for mature beans. The pod is the first layer, and the tough outer skin on each bean is the second. Small, young beans can sometimes be eaten whole, but larger beans need both layers removed.
How long do you blanch fava beans for peeling?
Exactly 60 seconds in boiling water, then straight into an ice bath for 2 to 3 minutes.
Can I peel fava beans without blanching?
You can, but it’s far more difficult. Blanching loosens the skin so it slips off with almost no effort. Without blanching, you’ll be fighting tough skins for a long time.
Can I eat the outer skin of fava beans?
Technically yes, but it’s tough, chewy, and slightly bitter. Removing it dramatically improves both flavor and texture.
Can I use frozen fava beans?
Yes. If you buy frozen beans that still have their skins, blanch and shock them the same way and the skins will slip off.
How many pods do I need per serving?
Roughly 1 pound of pods yields about 1 cup of shelled beans, and about ¾ cup after peeling. Plan on about ¼ pound of pods per person as a side.
Can I prepare fava beans ahead of time?
Yes. Peeled fava beans keep in the refrigerator for up to 3 days and freeze beautifully for up to 6 months.
Why are my fava beans bitter?
You likely left some of the outer skin or the thin inner membrane on the beans. Remove every bit of the skin for the sweetest flavor.
What can I make with peeled fava beans?
Salads, dips, risotto, pasta, soups, bruschetta, and simple bowls with olive oil and lemon all work beautifully.
Is it worth peeling fava beans from scratch?
Absolutely. Freshly peeled fava beans have a sweet, buttery flavor that frozen or canned versions can’t match, and the process takes just minutes once you know the technique.
Nutrition (estimated per 1 cup of peeled cooked fava beans)
- Calories: 185-200
- Protein: 13-15g
- Carbohydrates: 33-35g
- Fat: 1-2g
- Fiber: 9-11g
- Sugar: 3-4g
- Folate: 40-45% DV
- Iron: 15-20% DV
Note: Nutrition values are estimates and may vary based on specific ingredients, portion sizes, and cooking methods.
Recipe Card
| The Easiest Way to Peel Fava Beans | |
| Cuisine | Mediterranean / Kitchen Basics |
| Course | How-To Guide / Side Dish |
| Prep Time | 10 minutes |
| Cook Time | 5 minutes |
| Total Time | 15 minutes |
| Servings | 4 (about 1½ cups peeled beans) |
| Calories | 185-200 per cup |
Ingredients
- 2 lbs fresh fava beans in pods (yields about 1½ to 2 cups peeled beans)
- Water (enough to fill a large pot)
- 4 cups ice (for the ice bath)
- 1 tablespoon salt (optional, for blanching water)
Instructions
- Choose firm, bright green pods that feel heavy for their size. Rinse and pat dry.
- Snap off the stem end of each pod and run your thumb along the seam to open it. Pop out the beans and discard the pods.
- Bring a large pot of water to a rolling boil. Add optional salt.
- Fill a large bowl with cold water and 4 cups of ice. Set it next to the stove.
- Add the shelled beans to the boiling water and blanch for exactly 60 seconds.
- Drain immediately and transfer the beans straight into the ice bath. Cool for 2 to 3 minutes.
- Drain the cooled beans and pat them dry with a clean kitchen towel.
- Pinch each bean between your thumb and forefinger. The outer skin will slip right off. Discard the skins.
- Use the peeled beans immediately, or refrigerate for up to 3 days or freeze for up to 6 months.
Notes
- Blanch for exactly 60 seconds – any longer and the beans will lose their color and firm texture.
- Have the ice bath ready before you start blanching so you can cool the beans immediately.
- Pat the beans dry before peeling – dry beans are much easier to grip.
- Smaller pods yield sweeter, more tender beans than large, mature ones.
- Peeled fava beans freeze beautifully for up to 6 months.
- Save the discarded pods and skins for vegetable stock if you like.
Nutrition (per 1 cup peeled cooked fava beans)
Calories: 185-200 | Protein: 13-15g | Carbs: 33-35g | Fat: 1-2g | Fiber: 9-11g | Sugar: 3-4g | Folate: 40-45% DV | Iron: 15-20% DV
Love This Guide? Explore more seasonal and delicious recipes in our collections of Appetizer Recipes, Brunch Recipes, Dinner Recipes, and Salad Recipes.
Enjoy your freshly peeled Fava Beans!
Don’t forget to share your creation and tag us!