
Fresh Cherry Crisp sweet, tart cherries nestled under a golden, buttery oat topping that’s perfectly crisp and crumbly. It’s the kind of dessert that tastes like summer in every single bite, and it’s so easy to make that you’ll find yourself whipping it up all season long.
I first discovered cherry crisp during a trip to a local orchard, where cherries were at their peak. The combination of sweet and tart cherries with a crunchy, buttery topping was absolutely heavenly. I knew I had to recreate it at home. After plenty of trial and error, I perfected the ratio – sweet, juicy cherries with just the right amount of sugar and spice, topped with a buttery, oat-studded crisp that bakes to golden perfection.
This recipe is incredibly simple – just a few basic ingredients and about 10 minutes of prep. The filling comes together in minutes, the topping is a simple mix of butter, flour, oats, and brown sugar, and then the oven does the rest. The result is a dessert that’s rustic, comforting, and absolutely delicious. Serve it warm with a scoop of vanilla ice cream or a dollop of whipped cream, and you’ll have a dessert that everyone will love.
Why This Recipe Works: The perfect balance of sweet and tart cherries with a crunchy, buttery oat topping – simple, rustic, and absolutely delicious. The oat topping stays crisp even after baking, and the filling thickens beautifully without being runny.
What Is Cherry Crisp?
Cherry crisp is a classic American dessert featuring a layer of sweet, tart cherries baked under a crumbly, buttery topping made with oats, flour, brown sugar, and butter. Unlike a cobbler (which has a biscuit‑like topping) or a crumble (which lacks oats), a crisp gets its signature texture from the combination of oats and butter that bakes into a golden, crunchy topping. It’s the perfect way to showcase fresh, ripe cherries at their peak.
Why It’s a Summer Favorite
Cherry crisp is loved for its incredible flavor, simplicity, and versatility. It’s a dessert that’s rustic enough for a casual family dinner yet elegant enough for entertaining. The combination of sweet, tart cherries and crunchy, buttery topping is universally loved, and it’s a wonderful way to make the most of fresh summer cherries.
Flavor & Texture Profile
- Flavor: Sweet, tart, and warmly spiced – the cherries shine with a hint of cinnamon and almond extract, while the brown sugar topping adds a rich, caramelized sweetness.
- Texture: Tender, juicy cherries with a golden, crunchy, buttery oat topping – the perfect contrast of soft and crisp.
- Aroma: The warm, comforting scent of baked cherries, cinnamon, and brown sugar filling your kitchen.
Why You’ll Love This Recipe
Quick & Easy
Ready in about 10 minutes of prep – the oven does the rest.
Simple Ingredients
Just cherries, butter, flour, oats, sugar, and spices.
Perfectly Balanced
Sweet, tart cherries with just the right amount of warm spice.
Kid-Approved
Kids love the sweet, comforting flavors – it’s a family favorite.
- Quick & Easy: Ready in about 10 minutes of prep – the oven does the rest.
- Simple Ingredients: Just cherries, butter, flour, oats, sugar, and spices – nothing fancy.
- Perfectly Balanced: Sweet, tart cherries with just the right amount of warm spice.
- Incredible Texture: The oat topping bakes up golden and crunchy, perfectly complementing the tender fruit.
- Versatile: Serve warm with ice cream, whipped cream, or on its own.
- Great for Entertaining: A rustic, impressive dessert that’s surprisingly simple.
- Kid-Approved: Kids love the sweet, comforting flavors – it’s a family favorite.
Ingredients
For the Cherry Filling
- Fresh cherries – 6 cups (about 2 lbs, pitted and halved)
- Granulated sugar – ½ cup (adjust based on sweetness of cherries)
- Lemon juice – 1 tablespoon (freshly squeezed)
- Cornstarch – 2 tablespoons (thickens the juices)
- Ground cinnamon – ½ teaspoon
- Almond extract – ¼ teaspoon (optional, enhances cherry flavor)
- Pinch of salt – enhances the sweetness
For the Crisp Topping
- All-purpose flour – ¾ cup
- Rolled oats – ¾ cup (old-fashioned, not quick)
- Brown sugar – ½ cup (packed, light or dark)
- Granulated sugar – ¼ cup
- Ground cinnamon – ½ teaspoon
- Salt – ¼ teaspoon
- Unsalted butter – ½ cup (1 stick, cold, cut into small cubes)
Premium Ingredient Options
- Cherries: Use fresh, ripe cherries – sweet cherries like Bing or Rainier are ideal, but tart cherries also work beautifully.
- Butter: Use unsalted butter so you can control the salt level.
- Oats: Old-fashioned rolled oats provide the best texture – quick oats will make the topping less crisp.
- Brown Sugar: Dark brown sugar adds a deeper, more caramelized flavor.
Budget Alternatives
- Use frozen cherries if fresh aren’t in season – no need to thaw, just increase the baking time slightly.
- Use margarine instead of butter (though butter gives the best flavor).
- Use all-purpose flour if you don’t have whole wheat flour.
Common Ingredient Mistakes
- Skipping the cornstarch: Cornstarch thickens the cherry juices – without it, the filling can be watery.
- Using quick oats: Quick oats absorb more liquid and create a softer, less crispy topping.
- Not using enough lemon juice: Lemon brightens the cherries and balances the sweetness – don’t skip it.
Ingredient Substitutions
- Gluten-Free: Use a gluten-free all-purpose flour blend and certified gluten-free oats.
- Dairy-Free: Use vegan butter or coconut oil instead of butter.
- Vegan: Use vegan butter and ensure your sugar is vegan.
- Low-Sugar: Reduce sugar by half or use a sugar substitute – the cherries will still be sweet.
- Nut-Free: This recipe is naturally nut-free.
Equipment
Essential Tools
- 8×8 or 9×9 baking dish (or a 9-inch pie dish)
- Large mixing bowl (for the filling)
- Medium mixing bowl (for the topping)
- Measuring cups and spoons
- Cherry pitter (optional but helpful)
- Pastry blender or fork (for cutting in the butter)
Optional Tools
- Parchment paper or foil (for easy cleanup)
- Ice cream scoop (for serving)
Step-by-Step Instructions
- Prep the Cherries
Wash the cherries thoroughly. Pit the cherries using a cherry pitter or by cutting them in half and removing the pit. You can leave the cherries whole or halve them – halving helps release more juice. You should have about 6 cups of pitted cherries.
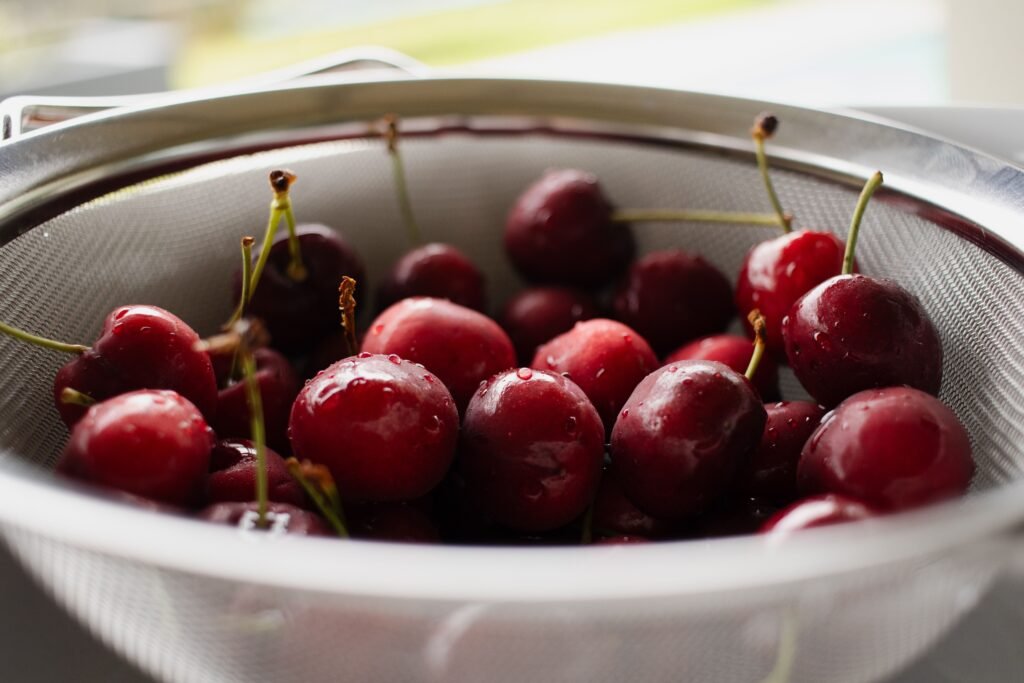
Visual cue: The cherries should be deep red, juicy, and fragrant.
Pro tip: Wear an apron – cherry juice stains! - Make the Filling
In a large bowl, combine the pitted cherries, granulated sugar, lemon juice, cornstarch, cinnamon, almond extract (if using), and salt. Toss gently until the cherries are evenly coated. Let the mixture sit for 10-15 minutes while you prepare the topping – this allows the cherries to release their juices.
Visual cue: The cherries will look glossy and coated in a syrupy mixture.
Why this matters: The sugar draws out the juices, creating a delicious syrup that thickens as it bakes. - Make the Topping
In a medium bowl, combine the flour, rolled oats, brown sugar, granulated sugar, cinnamon, and salt. Add the cold butter cubes and use a pastry blender, two knives, or your fingers to cut the butter into the dry ingredients until the mixture resembles coarse crumbs with some pea-sized pieces of butter.
Texture cue: The mixture should be crumbly and clump together when pressed.
Pro tip: Keep the butter cold – cold butter creates a crispier topping. - Assemble the Crisp
Preheat your oven to 375°F (190°C). Pour the cherry filling into an 8×8 or 9×9 baking dish, spreading it evenly. Sprinkle the topping evenly over the cherries, covering the surface completely.
Visual cue: The cherries should be evenly coated in syrup, and the topping should cover the fruit in an even layer.
Pro tip: For extra crunch, add a handful of chopped pecans or walnuts to the topping. - Bake
Place the baking dish on a baking sheet to catch any drips. Bake for 40-50 minutes, until the filling is bubbling and the topping is golden brown and crisp. If the topping is browning too quickly, cover loosely with foil for the last 10-15 minutes of baking.
Visual cue: The filling should be bubbly around the edges, and the topping should be a deep golden brown.
Aroma cue: The warm scent of baked cherries, cinnamon, and brown sugar will fill your kitchen. - Cool and Serve
Remove the crisp from the oven and let it cool on a wire rack for 10-15 minutes before serving. This allows the filling to set slightly. Serve warm with a scoop of vanilla ice cream or a dollop of whipped cream.
Pro tip: The crisp is best served warm – the contrast between the hot fruit and cold ice cream is heavenly.
Chef’s Secret: For the absolute best cherry crisp, use a mix of sweet and tart cherries. The combination creates a more complex, nuanced flavor. If you can’t find fresh tart cherries, add an extra tablespoon of lemon juice to balance the sweetness.
Expert Chef Tips
For the Perfect Cherry Crisp
- Use Ripe Cherries: The sweetness and flavor of the crisp depend on the quality of the cherries – use ripe, fragrant cherries for the best results.
- Don’t Skip the Cornstarch: Cornstarch thickens the cherry juices, preventing a watery filling. If you don’t have cornstarch, use flour (2 tablespoons) or tapioca starch.
- Keep the Butter Cold: Cold butter creates a flaky, crispy topping – don’t let it warm up before cutting it in.
- Let It Rest: Let the crisp cool for at least 10 minutes before serving – this allows the filling to set and prevents it from being too runny.
- Serve with Ice Cream: A scoop of vanilla ice cream is the perfect accompaniment – the cold creaminess balances the warm, sweet fruit.
Flavor Balancing
- Sweetness: Adjust the sugar based on the sweetness of your cherries – if your cherries are very sweet, reduce the sugar slightly.
- Acid: Lemon juice brightens the cherries and balances the sweetness – don’t skip it.
- Spice: Cinnamon and almond extract add warmth – feel free to adjust to your taste.
- Salt: A pinch of salt enhances all the flavors – don’t omit it.
Texture Improvement Tips
- Use a Combination of Sugar Types: Brown sugar adds moisture and a caramelized flavor, while granulated sugar adds crunch.
- Don’t Overmix the Topping: The topping should be crumbly with visible pieces of butter – overmixing will make it dense.
- Use Old-Fashioned Oats: Old-fashioned oats hold their texture better than quick oats, creating a crispier topping.
Cooking Science: The sugar in the filling draws out moisture from the cherries through osmosis, creating a syrup that thickens as it bakes with the help of the cornstarch. The butter in the topping creates steam as it melts, creating a crispy, flaky texture. The combination of flour, oats, and butter creates a crumbly topping that bakes to golden perfection. The salt and spices enhance the flavor of the cherries, making them taste even more vibrant.
Troubleshooting
- Filling is too watery – You may not have used enough cornstarch, or the cherries released too much juice. Let the crisp rest longer before serving, or use an extra tablespoon of cornstarch next time.
- Topping is too dry – You may have used too little butter – next time, add an extra 2 tablespoons of butter.
- Topping is too soggy – You may have used quick oats instead of old-fashioned – quick oats absorb more moisture. Make sure the butter is cold and the topping is crumbly.
- Topping is too brown – Cover the crisp with foil for the last 10-15 minutes of baking to prevent over-browning.
- Cherries are too tart – Add a little extra sugar to the filling – taste the cherries before baking and adjust accordingly.
- Cherries are too sweet – Add a little extra lemon juice to balance the sweetness.
Recipe Variations
Classic Cherry Crisp
Follow the recipe as written – it’s the perfect balance of sweet, tart cherries and crunchy, buttery topping.
Cherry Berry Crisp
Add 1 cup of fresh blueberries, raspberries, or blackberries to the cherry filling for a berry-infused version.
Vegan Cherry Crisp
Use vegan butter or coconut oil instead of butter, and ensure your sugar is vegan.
Spiced Cherry Crisp
Add ½ teaspoon of ground ginger and ¼ teaspoon of allspice to the filling for a warm, spiced version.
More Delicious Variations
- Cherry & Peach Crisp: Replace half the cherries with fresh peaches for a different flavor combination.
- Gluten-Free Cherry Crisp: Use a gluten-free all-purpose flour blend and certified gluten-free oats.
- Cherry & Almond Crisp: Add ½ teaspoon of almond extract to the filling and sprinkle sliced almonds on top of the crisp before baking.
Serving Suggestions
Classic Pairings
Vanilla ice cream, whipped cream, or a dollop of Greek yogurt. The cold, creamy contrast with the warm, sweet fruit is heavenly.
Presentation Ideas
Serve in individual bowls or ramekins for a personal touch. Top with a scoop of ice cream, a sprinkle of cinnamon, and a fresh mint leaf for a beautiful finish.
Drinks
Perfect with a cup of coffee, a glass of cold milk, or a sweet dessert wine.
Storage & Reheating
Refrigeration
Store leftover crisp in an airtight container in the refrigerator for up to 3-4 days. The topping will soften slightly but will still be delicious.
Freezing
Freeze baked crisp (before or after baking) in a freezer-safe container for up to 2-3 months. Thaw overnight in the refrigerator and reheat before serving.
Reheating Tips
Reheat individual portions in the microwave for 30-60 seconds, or reheat the whole crisp in a 350°F oven for 10-15 minutes until warmed through and the topping is crisp again.
FAQ
What is the difference between a crisp, a crumble, and a cobbler?
A crisp has a topping made with oats, flour, butter, and sugar that bakes up crunchy. A crumble has a similar topping but without oats. A cobbler has a biscuit-like topping that’s spooned or dropped over the fruit.
Do I need to pit the cherries?
Yes – cherry pits are hard and inedible. Use a cherry pitter or cut the cherries in half to remove the pits.
Can I use frozen cherries?
Yes – use frozen cherries without thawing. You may need to increase the baking time by 5-10 minutes and add an extra tablespoon of cornstarch to account for the extra moisture.
Can I use canned cherries?
Yes, but drain them well and reduce the sugar in the filling – canned cherries are already sweet.
Why is my cherry crisp runny?
Your cherries may have been very juicy – use an extra tablespoon of cornstarch next time. You can also let the crisp rest for 10-15 minutes before serving to allow the juices to thicken.
Can I make this dairy-free?
Yes – use vegan butter or coconut oil instead of butter. The topping will still be delicious and crisp.
Can I make this gluten-free?
Yes – use a gluten-free all-purpose flour blend and certified gluten-free oats.
Can I add other fruits?
Absolutely – blueberries, raspberries, peaches, and nectarines all pair beautifully with cherries.
How do I know when the crisp is done?
The filling should be bubbly around the edges, and the topping should be golden brown and crisp. This usually takes 40-50 minutes at 375°F.
Can I make this ahead of time?
Yes – assemble the crisp and refrigerate (unbaked) for up to 24 hours. Add 5-10 minutes to the baking time if baking cold.
Nutrition (estimated per serving – 1/6 of an 8×8 dish)
- Calories: 320-420
- Protein: 4-6g
- Carbohydrates: 50-65g
- Fat: 12-18g
- Fiber: 4-6g
- Sugar: 30-45g
- Vitamin A: 10-15% DV
- Vitamin C: 15-20% DV
Note: Nutrition values are estimates and may vary based on specific ingredients, portion sizes, and cooking methods.
Recipe Card
| Fresh Cherry Crisp – Sweet, Tart & Irresistible | |
| Cuisine | American |
| Course | Dessert |
| Prep Time | 15 minutes |
| Cook Time | 40-50 minutes |
| Total Time | 1 hour |
| Servings | 6-8 |
| Calories | 320-420 per serving |
Ingredients
For the Filling:
- 6 cups fresh cherries (about 2 lbs, pitted and halved)
- ½ cup granulated sugar
- 1 tablespoon fresh lemon juice
- 2 tablespoons cornstarch
- ½ teaspoon ground cinnamon
- ¼ teaspoon almond extract (optional)
- Pinch of salt
For the Topping:
- ¾ cup all-purpose flour
- ¾ cup rolled oats (old-fashioned)
- ½ cup brown sugar (packed)
- ¼ cup granulated sugar
- ½ teaspoon ground cinnamon
- ¼ teaspoon salt
- ½ cup unsalted butter (cold, cut into small cubes)
Instructions
- Preheat oven to 375°F (190°C).
- In a large bowl, combine cherries, sugar, lemon juice, cornstarch, cinnamon, almond extract (if using), and salt. Toss to coat. Let sit for 10-15 minutes.
- In a medium bowl, combine flour, oats, brown sugar, granulated sugar, cinnamon, and salt. Cut in cold butter until crumbly.
- Pour cherry filling into an 8×8 or 9×9 baking dish. Sprinkle topping evenly over the cherries.
- Bake for 40-50 minutes, until filling is bubbly and topping is golden brown.
- Cool for 10-15 minutes before serving. Serve warm with ice cream or whipped cream.
Notes
- Use ripe, fresh cherries for the best flavor.
- Don’t skip the cornstarch – it thickens the cherry juices.
- Keep the butter cold for a crispier topping.
- Let the crisp cool for at least 10 minutes before serving.
- Store leftovers in the refrigerator for up to 3-4 days.
Nutrition (per serving)
Calories: 320-420 | Protein: 4-6g | Carbs: 50-65g | Fat: 12-18g | Fiber: 4-6g | Sugar: 30-45g | Vitamin A: 10-15% DV | Vitamin C: 15-20% DV
Enjoy your homemade Cherry Crisp!
Don’t forget to share your creation and tag us!